
10 Tips for Manufacturing Corrugated Boxes
Corrugated packaging looks simple until a box arrives crushed, poorly sized, or difficult to stack. Reliable manufacturing corrugated boxes depends on coordinated choices: board grade, flute profile, sheet moisture, adhesive application, print registration, and converting setup. Each choice affects strength, material use, and production consistency. Small details matter. A slight warp can disrupt feeding; an uneven score can weaken a fold. These are practical issues, not merely specifications on a drawing.
The scale of recovery makes efficient production especially relevant. The U.S. Environmental Protection Agency’s 2018 Advancing Sustainable Materials Management report estimated that 32.1 million tons of corrugated boxes were recycled from 33.3 million tons generated. That is a 96.5% recycling rate, based on the report’s figures. The data are historical, not a current-year measurement, but they show corrugated’s significant role in the paper recycling stream. The Fibre Box Association also tracks industry performance through resources such as its BoxScore reports, which help manufacturers understand changing market conditions. Good process control supports dependable boxes and can reduce avoidable scrap. It does not eliminate every problem. That part deserves honest attention.
This guide presents ten practical tips for improving box design, machine setup, quality checks, and material efficiency. It focuses on decisions teams can verify on the production floor, from checking board condition before conversion to reviewing finished-box dimensions and compression performance. The right approach depends on the product, shipping environment, equipment, and customer requirements. There is no universal setting. Start with evidence, test carefully, and document what works.
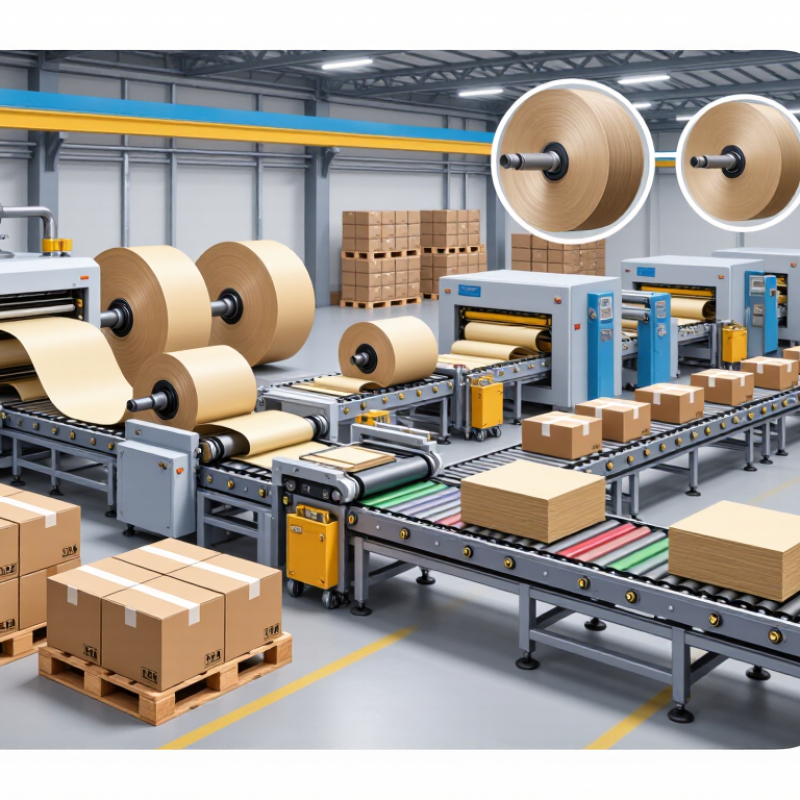
Choosing Suitable Paper Grades and Flute Profiles
Choosing paper grades and flute profiles starts with the box’s job, not a standard recipe. Match liner and medium strength to product weight, stacking height, and shipping conditions. Higher-grade kraft paper can improve strength, while recycled grades may suit less demanding loads. But basis weight alone does not predict performance. Ask for edge-crush or burst-test data, then check that the finished box meets your handling needs.
Tips: Compare sample boxes under realistic stacking and humidity conditions. Keep notes. A quick trial can reveal weak corners or crushed flutes before production.
Flute choice affects cushioning, compression, thickness, and print quality. A-flute offers thicker cushioning; B-flute is thinner and resists crushing well. C-flute balances cushioning and stacking strength for many shipping boxes. E- and F-flutes create compact packages with smoother printing surfaces. Double-wall combinations can support heavier loads, though they add material and bulk. Don’t assume the strongest board is always best; excess strength can raise costs without improving protection. Results can also vary with box dimensions, seams, and storage moisture, so test the complete design. A small adjustment to the grade or flute may solve a problem better than simply adding layers.
| Tip | Design consideration | Paper grade guidance | Flute profile guidance | Typical application |
|---|---|---|---|---|
| 1. Define the box’s job first | Assess product weight, dimensions, stacking duration, shipping method, and expected handling before selecting materials. | For initial trials, compare liner and medium combinations by measured performance rather than basis weight alone. | Consider single-wall construction for many general shipping needs; evaluate double-wall when greater stacking or handling strength is required. | Creates a practical starting specification for shipping cartons. |
| 2. Choose linerboard for the required strength and appearance | Linerboard forms the flat outer and inner surfaces. Strength, print surface, recycled content, and moisture exposure can all affect the choice. | Common options include kraftliner and recycled testliner. Indicative basis weights are often about 125–300 g/m², depending on grade and specification. | Pair the liner choice with a flute and medium that meet the required board performance. | Shipping boxes, printed retail packs, and cartons with different appearance requirements. |
| 3. Match the medium to the board design | The fluted medium helps form the board structure and contributes to cushioning and compression performance. | Corrugating medium is commonly specified by basis weight; indicative values often fall around 90–180 g/m², with actual grades varying by mill and market. | Medium selection should be validated with the chosen flute, liners, and conversion process. | Boxes requiring a balance of cushioning, stiffness, and material efficiency. |
| 4. Use A-flute when cushioning is a priority | A-flute has relatively large flutes that provide cushioning and thickness, but may be less suited to fine graphics and tight folds. | Select liner and medium grades based on product mass, transit conditions, and test results. | Typical flute height is approximately 4.5–5.0 mm; dimensions vary by specification. | Protective packaging for fragile items and applications needing greater cushioning. |
| 5. Consider B-flute for crush resistance and conversion | The relatively low profile can provide a flatter printing surface and good resistance to surface crushing. | Choose grades to meet the required edgewise compression and box compression performance. | Typical flute height is approximately 2.5–3.0 mm; dimensions vary by specification. | Retail-ready packs, die-cut boxes, and many small-to-medium shipping cartons. |
| 6. Consider C-flute for a general-purpose balance | C-flute offers a compromise between cushioning and stacking performance and is widely used for shipping containers. | Use the lightest suitable combination only after confirming performance under the intended distribution conditions. | Typical flute height is approximately 3.5–4.0 mm; dimensions vary by specification. | General-purpose corrugated shipping boxes. |
| 7. Use E-flute when a thinner, printable board is needed | The fine profile supports a relatively smooth surface and compact package design, but provides less cushioning thickness than larger flutes. | Assess liner surface quality and print requirements alongside strength needs. | Typical flute height is approximately 1.1–1.7 mm; dimensions vary by specification. | Small cartons, point-of-sale packaging, and printed consumer packs. |
| 8. Reserve F-flute for fine detail and compact packs | Its very fine profile can support detailed printing and small package dimensions; performance depends on the complete board construction. | Confirm that liners and medium are compatible with the printer, converting equipment, and end-use requirements. | Typical flute height is approximately 0.6–0.9 mm; dimensions vary by specification. | Small retail cartons and packaging where print detail and a thin profile matter. |
| 9. Match flute choice to printing and converting | Flute profile can affect print smoothness, folding, die-cutting, and package thickness. Validate the board on the intended equipment. | For high-quality graphics, consider liner surface and print process as well as grade and basis weight. | Fine flutes such as E or F generally offer a flatter surface; larger flutes provide more board thickness. | Printed cartons, complex die-cuts, and automated packing lines. |
| 10. Verify the finished board and box | Paper grade and flute labels do not by themselves guarantee performance. Test the completed construction under relevant conditions. | Specify measurable requirements and check supplier certificates and production consistency. | Compare constructions using applicable tests, such as edge crush resistance, box compression, and cushioning tests where relevant. | Final approval for distribution, stacking, and product-protection requirements. |
| Specification note: Basis-weight ranges and flute dimensions are indicative industry ranges, not universal standards. Actual values vary by supplier, region, board construction, and measurement method. Confirm specifications with the board supplier and validate the finished box for its intended use. | ||||
Related Posts
-
Maximizing Efficiency with Sustainable Manufacturing of Corrugated Boxes
-

Why Choose Corrugated Boxes for Packing Your Products?
-
What Are the Best Package Boxes for Your Business Needs?
-
Top Manufacturing Corrugated Boxes for Global Buyers?
-
What is a Supply Box and How it Can Revolutionize Your Storage Solutions
-

Top Packaging Boxes Manufacturer for Your Business Needs?